wsl コマンドを実行します。
Fish Audioをインストールします。
WSLをインストールします。インストール手順の詳細はこちらの記事を参照してください。
PowerShellのプロンプトで次のコマンドを実行します。
wsl --install -d Ubuntu
アップデートコマンドですが、通常は不要です。
wsl --update
WSLのプロンプトで次のコマンドを1行ずつ実行します。
sudo apt install -y curl
curl -LsSf https://astral.sh/uv/install.sh | sh
source $HOME/.local/bin/env
uv --version
最後のuv --versionを実行して、以下を一例とするバージョンが表示されれば成功です。
uv 0.11.2 (x86_64-unknown-linux-gnu)
WSLのプロンプトで次のコマンドを1行ずつ実行します。
sudo apt update
sudo apt install -y git portaudio19-dev libsox-dev ffmpeg
sudo apt install -y build-essential python3-dev
git clone https://github.com/fishaudio/fish-speech.git
source $HOME/.local/bin/env
cd fish-speech
uv sync --python 3.12 --extra cu129
wsl コマンドを実行します。Fish Audio S2-Proのモデルをダウンロードします。次のコマンドを実行します。
uv tool install "huggingface_hub[cli]"
hf download fishaudio/s2-pro --local-dir checkpoints/s2-pro
インストールができたら、WebUIを起動します。次のコマンドを実行します。
uv run python tools/run_webui.py --compile
uv run python tools/run_webui.py
次のエラーで起動できない場合は、以下の手順で修正します。
UnboundLocalError: cannot access local variable 'torchaudio'
次のコマンドを実行して、fish_speech/inference_engine/reference_loader.py のファイルを開きます。
nano fish_speech/inference_engine/reference_loader.py
class ReferenceLoader:
    def __init__(self) -> None:
        """
        Component of the TTSInferenceEngine class.
        Loads and manages the cache for the reference audio and text.
        """
        self.ref_by_id: dict = {}
        self.ref_by_hash: dict = {}

        # Make Pylance happy (attribut/method not defined...)
        self.decoder_model: DAC
        self.encode_reference: Callable

        # Define the torchaudio backend
        # list_audio_backends() was removed in torchaudio 2.9
        try:
            backends = torchaudio.list_audio_backends()
            if "ffmpeg" in backends:
                self.backend = "ffmpeg"
            else:
                self.backend = "soundfile"
        except AttributeError:
            # torchaudio 2.9+ removed list_audio_backends()
            # Try ffmpeg first, fallback to soundfile
            try:
                import torchaudio.io._load_audio_fileobj  # noqa: F401

                self.backend = "ffmpeg"
            except (ImportError, ModuleNotFoundError):
                self.backend = "soundfile"
class ReferenceLoader:
    def __init__(self) -> None:
        """
        Component of the TTSInferenceEngine class.
        Loads and manages the cache for the reference audio and text.
        """
        self.ref_by_id: dict = {}
        self.ref_by_hash: dict = {}

        # Make Pylance happy (attribut/method not defined...)
        self.decoder_model: DAC
        self.encode_reference: Callable

        # Define the torchaudio backend
        # list_audio_backends() was removed in torchaudio 2.9
        try:
            backends = torchaudio.list_audio_backends()
            if "ffmpeg" in backends:
                self.backend = "ffmpeg"
            else:
                self.backend = "soundfile"
        except AttributeError:
            # torchaudio 2.9+ removed list_audio_backends()
            # Try ffmpeg first, fallback to soundfile
            try:
                from torchaudio.io import _load_audio_fileobj  # noqa: F401 (この行を修正します)

                self.backend = "ffmpeg"
            except (ImportError, ModuleNotFoundError):
                self.backend = "soundfile"
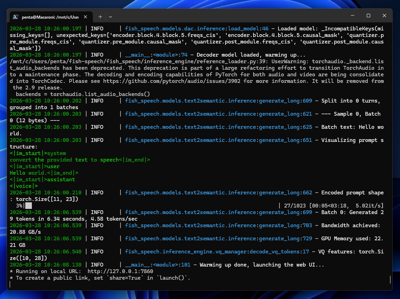
正しく起動できると、Running on local URL: http://127.0.0.1:7860 が表示されます。
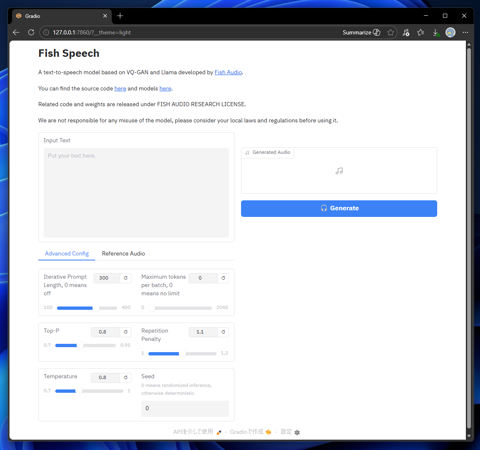
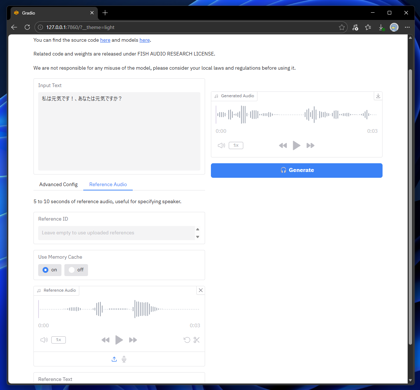
Webブラウザで、http://127.0.0.1:7860 にアクセスします。下図のページが表示されます。
[Input Text]のテキストボックスに音声合成したいテキストを入力します。入力後右側の[Generate]ボタンをクリックします。
音声が生成できると右側に結果の波形が表示され、再生できます。
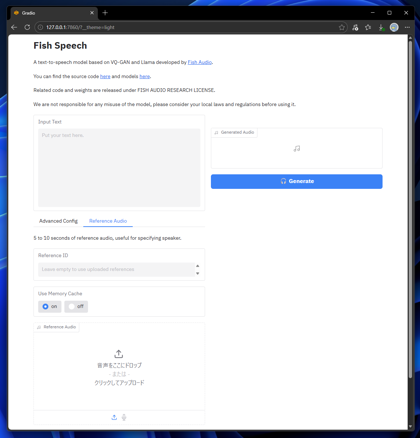
参照音声を利用する場合は、画面下部の[Reference Audio]のタブをクリックして選択します。
タブ内に[Reference Audio]の枠が表示されますので、こちらの枠に参照したい音声をドロップするか、枠をクリックすると表示されるファイル選択ダイアログで
参照音声を選択してアップロードします。
入力後右側の[Generate]ボタンをクリックします。音声が生成できると右側に結果の波形が表示され、再生できます。
生成結果は以下の動画で紹介しています。
Fish Audioの場合には、感情・話し方タグを利用できます。書式は以下の通りです。
[(感情・話し方)]