新しい音楽生成AIのYUE2というものが登場したそうですが、インストール方法を知りたいです?
また、生成される音楽はどんな感じなんでしょうか?
NumPy 2.2.6 がインストールされるため、バージョン 3.13をインストールすると良いです。Python 3.14はNumPy 2.2の動作対象外となります。


YuE2 のインストール手順を紹介します。
Pythonをインストールします。バージョンは3.10以上が推奨されています。Pythonのインストール手順はこちらの記事を参照してください。
コマンドプロンプト、またはPowerShellで次のコマンドを実行します。
cd (YuE2を配置するディレクトリ)
git clone https://github.com/multimodal-art-projection/YuE.git
cd YuE
(Python.exeのフルパス)\python.exe -m venv .venv
.venv\Scripts\activate
python -m pip install --upgrade pip
python -m pip install .
GPU版のPyTorchをインストールします。
python -m pip install --force-reinstall --no-deps "torch==2.10.0+cu128" --index-url https://download.pytorch.org/whl/cu128
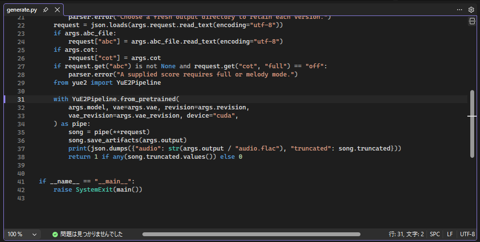
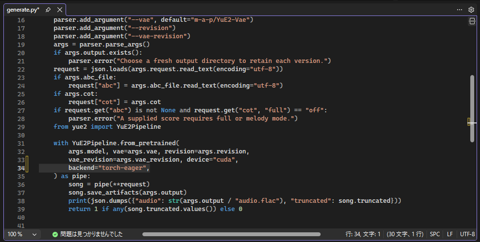
\YuE\examples\generate.py ファイルの以下の部分を変更します。
backend="torch-eager", を追記します。
    with YuE2Pipeline.from_pretrained(
        args.model, vae=args.vae, revision=args.revision,
        vae_revision=args.vae_revision, device="cuda",
    ) as pipe:
        song = pipe(**request)
        song.save_artifacts(args.output)
        print(json.dumps({"audio": str(args.output / "audio.flac"), "truncated": song.truncated}))
        return 1 if any(song.truncated.values()) else 0
    with YuE2Pipeline.from_pretrained(
        args.model, vae=args.vae, revision=args.revision,
        vae_revision=args.vae_revision, device="cuda",
        backend="torch-eager",
    ) as pipe:
        song = pipe(**request)
        song.save_artifacts(args.output)
        print(json.dumps({"audio": str(args.output / "audio.flac"), "truncated": song.truncated}))
        return 1 if any(song.truncated.values()) else 0
なお、24GB以上VRAMがある場合は次の設定も追加します。memory_budget_gib=(VRAMの容量)
    with YuE2Pipeline.from_pretrained(
        args.model, vae=args.vae, revision=args.revision,
        vae_revision=args.vae_revision, device="cuda",
        backend="torch-eager",
        memory_budget_gib=32,
    ) as pipe:
        song = pipe(**request)
        song.save_artifacts(args.output)
        print(json.dumps({"audio": str(args.output / "audio.flac"), "truncated": song.truncated}))
        return 1 if any(song.truncated.values()) else 0
次のコマンドで起動します。
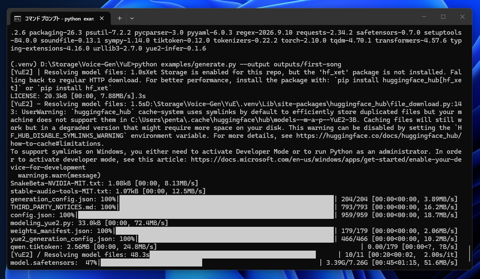
python examples/generate.py --output outputs/first-song
初回起動時にはモデルのダウンロードが実行されます。
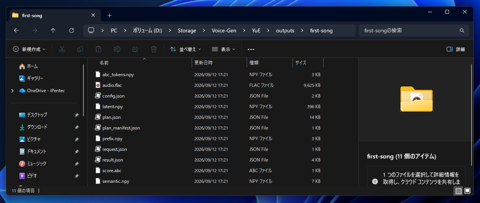
音楽が生成され、 outputs/first-song フォルダに flacファイルが生成できました。
プレイヤーで再生すると音楽が聴けます。
プロンプトを記述して曲を生成します。
examples/song.json ファイルがありますので、このファイルをコピーしてmy-song.jsonとして、別のフォルダに配置します。
{
  "id": "city_lights",
  "style": "English, warm piano pop, expressive female voice, acoustic piano, rounded bass and light drums, lyrical memorable melody, unhurried phrasing, 88 BPM",
  "lyrics": "[Verse]\nNeon fades along the lane\nFootsteps keep the time of rain\nFold the night and leave it here\nMorning has a sky to clear\n\n[Chorus]\nLet the day come into view\nEvery road begins with you\nHold a little room for light\nWe will sing beyond the night",
  "cot": "full",
  "seed": 831001
}
CodexやClaude Codeを利用して、my-song.jsonのあるフォルダをプロジェクトのフォルダに設定して、次の指示をします。
指示を出すと、JSONの検証までを実施して編集完了になります。
次のコマンドを実行します。
python examples/generate.py --request (my-song.jsonを配置したパス)/my-song.json --output outputs/my-song
WebのUIがあったほうが使いやすい場合はComfyUIでの導入手順を参照してください。詳しくはこちらの記事を参照してください。