C#でGoogle Drive にフォルダーを作成するコードを紹介します。
Google Drive APIを有効化します。手順はこちらの記事を参照してください。
Google APIのサービスアカウントを作成します。アカウントの作成手順はこちらの記事
を参照してください。
Google API サービスアカウントの認証キーを作成します。
作成の具体的な手順はこちらの記事を参照してください。
今回はJSON形式のキーファイルを作成しています。
Google Drive にログインし共有フォルダを作成し、先の手順で作成したサービスアカウントと共有します。
具体的な操作手順はこちらの記事を参照して下さい。
C#のプロジェクトを作成します。今回はWindows Formアプリケーションを作成します。
作成したプロジェクトに Google.Apis.Drive.V3 パッケージをインストールします。
インストールの手順はこちらの記事を参照してください。
プロジェクトフォルダにJSON形式で取得したキーファイルを配置します。プロパティウィンドウで[出力ディレクトリにコピー]のプロパティを
"常にコピーする"に設定して、ファイルが出力ディレクトリに配置される設定にします。
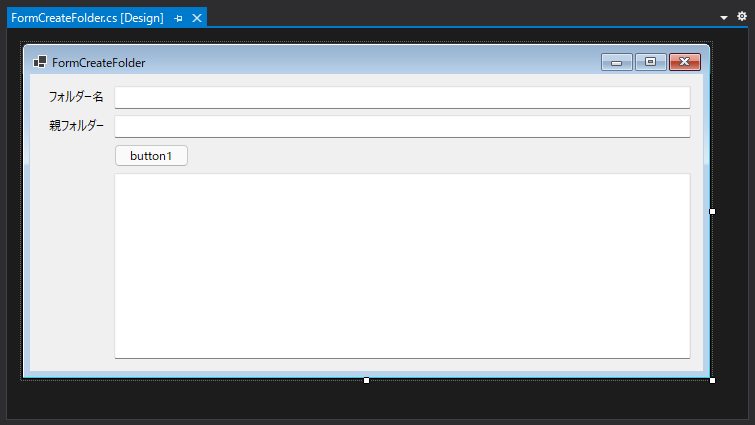
下図のフォームを作成します。ボタンとテキストボックスを2つ、複数行のテキストボックスを1つ配置します。
下記のコードを記述します。button1 のClickイベントを実装しています。
using System;
using System.Collections.Generic;
using System.ComponentModel;
using System.Data;
using System.Drawing;
using System.Linq;
using System.Text;
using System.Threading.Tasks;
using System.Windows.Forms;
using Google.Apis.Drive.v3;
using System.IO;


namespace GoogleDriveOperation
{
  public partial class FormCreateFolder : Form
  {
    public FormCreateFolder()
    {
      InitializeComponent();
    }

    static string[] Scopes = { DriveService.Scope.Drive };


    private void button1_Click(object sender, EventArgs e)
    {
      FileStream fs = new FileStream("(JSON形式のキーファイルのパス)", FileMode.Open, FileAccess.Read);
      Google.Apis.Auth.OAuth2.GoogleCredential credential = Google.Apis.Auth.OAuth2.GoogleCredential.FromStream(fs).CreateScoped(Scopes);

      Google.Apis.Services.BaseClientService.Initializer init = new Google.Apis.Services.BaseClientService.Initializer();
      init.HttpClientInitializer = credential;
      init.ApplicationName = "My Test App";
      DriveService service = new DriveService(init);


      Google.Apis.Drive.v3.Data.File fobj = new Google.Apis.Drive.v3.Data.File();
      if (string.IsNullOrEmpty(textBox1.Text) == true) {
        fobj.Name = "New Folder";
      }
      else {
        fobj.Name = textBox1.Text;
      }

      fobj.MimeType = "application/vnd.google-apps.folder";

      if (string.IsNullOrEmpty(textBox2.Text) == false) {
        fobj.Parents = new List<string> { textBox2.Text };
      }

      FilesResource.CreateRequest req = service.Files.Create(fobj);
      req.Fields = "id, name";
      Google.Apis.Drive.v3.Data.File newfile = req.Execute();

      textBox3.Text = string.Format("{0} フォルダー(id={1})を作成しました。\r\n", newfile.Name, newfile.Id);
    }
  }
}
認証やGoogle Driveのサービスオブジェクトの作成はこちらの記事を参照してください。
  FileStream fs = new FileStream("(JSON形式のキーファイルのパス)", FileMode.Open, FileAccess.Read);
  Google.Apis.Auth.OAuth2.GoogleCredential credential = Google.Apis.Auth.OAuth2.GoogleCredential.FromStream(fs).CreateScoped(Scopes);

  Google.Apis.Services.BaseClientService.Initializer init = new Google.Apis.Services.BaseClientService.Initializer();
  init.HttpClientInitializer = credential;
  init.ApplicationName = "My Test App";
  DriveService service = new DriveService(init);
作成するフォルダーのファイルオブジェクトを作成します。
Nameプロパティに作成するフォルダ名を設定します。MimeTypeプロパティにはフォルダを作成するため application/vnd.google-apps.folder を指定します。
フォルダの作成位置は、フォルダを配置する親フォルダのIDを Parents プロパティに設定します。
     Google.Apis.Drive.v3.Data.File fobj = new Google.Apis.Drive.v3.Data.File();
      if (string.IsNullOrEmpty(textBox1.Text) == true) {
        fobj.Name = "New Folder";
      }
      else {
        fobj.Name = textBox1.Text;
      }

      fobj.MimeType = "application/vnd.google-apps.folder";

      if (string.IsNullOrEmpty(textBox2.Text) == false) {
        fobj.Parents = new List<string> { textBox2.Text };
      }
Fileオブジェクトから、FilesResource.CreateRequest オブジェクトを作成します。
作成したFilesResource.CreateReques オブジェクトの Execute() メソッドを呼び出しフォルダーを作成します。
作成されたフォルダーの情報が Execute() メソッドの戻り値で返ります。作成されたたフォルダー名とフォルダーのIDをテキストボックスに表示します。
      FilesResource.CreateRequest req = service.Files.Create(fobj);
      req.Fields = "id, name";
      Google.Apis.Drive.v3.Data.File newfile = req.Execute();

      textBox3.Text = string.Format("{0} フォルダー(id={1})を作成しました。\r\n", newfile.Name, newfile.Id);
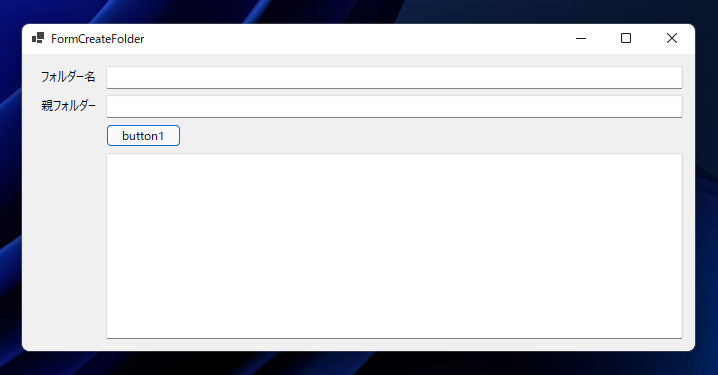
プロジェクトを実行します。下図のウィンドウが表示されます。
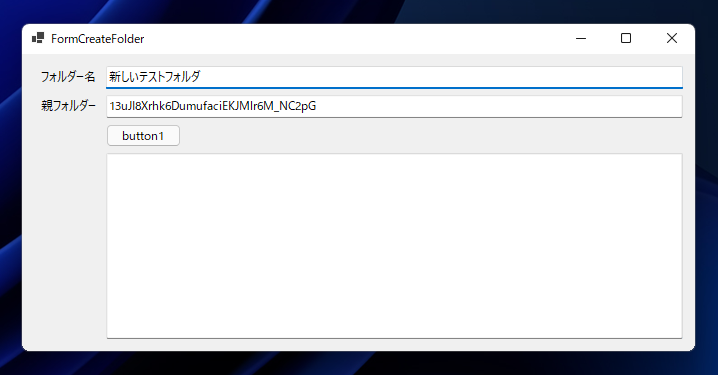
上部のテキストボックスに作成するフォルダーの名前を入力します。2つ目のテキストボックスには、作成するフォルダーを配置するフォルダーのIDを入力します。
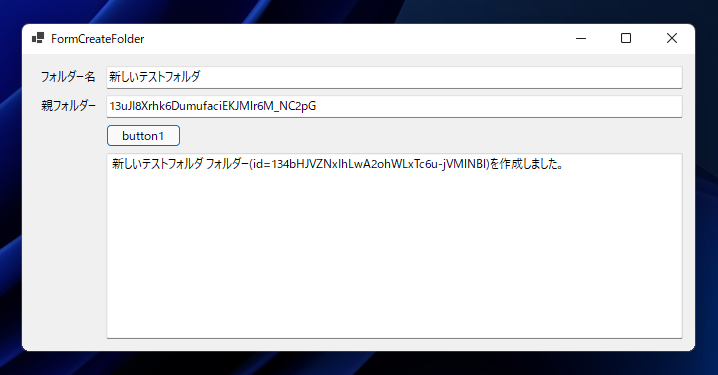
テキストボックス入力後[button1]ボタンをクリックします。Google Drvieにフォルダが作成され、作成されたフォルダの名前とIDがテキストボックスに表示されます。
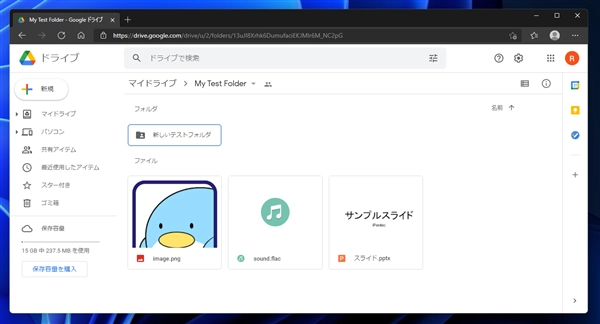
Google Drive で確認します。プログラムで指定したフォルダー名のフォルダーがGoogle Driveに作成されていることが確認できます。