SetTimer Windows APIを使ったタイマーコンポーネントのコードを紹介します。
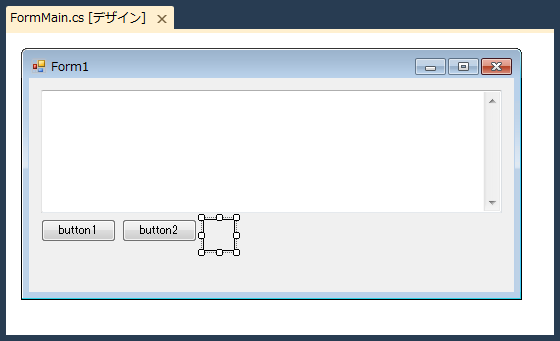
下図のUIを準備します。テキストボックスと、ボタン2つを配置します。
using System;
using System.Collections.Generic;
using System.ComponentModel;
using System.Diagnostics;
using System.Linq;
using System.Text;
using System.Windows.Forms;
using System.Runtime.InteropServices;
using System.Drawing;

namespace TimerDemo
{
  public partial class WindowsTimer : Control
  {
    [DllImport("user32.dll", ExactSpelling = true)]
    [return: MarshalAs(UnmanagedType.Bool)]
    static extern bool KillTimer(IntPtr hWnd, IntPtr uIDEvent);

    //[DllImport("user32.dll", ExactSpelling=true)]
    //static extern IntPtr SetTimer
    //  (IntPtr hWnd, IntPtr nIDEvent, uint uElapse, TimerProc lpTimerFunc);
    //delegate void TimerProc(IntPtr hWnd, uint uMsg, IntPtr nIDEvent, uint dwTime);

    [DllImport("user32.dll", ExactSpelling = true)]
    static extern IntPtr SetTimer(IntPtr hWnd, IntPtr nIDEvent, uint uElapse, IntPtr lpTimerFunc);

    const int WM_TIMER = 0x0113;

    IntPtr WindowHandle;

    public delegate void TimerDelegate(object sender);
    private TimerDelegate onTimer;

    public event TimerDelegate OnTimer
    {
      add
      {
        onTimer += value;
        UpdateTimer();
      }
      remove
      {
        onTimer -= value;
      }
    }

    private bool iEnabled;
    private uint iInterval;
    private bool TimerSet = false;

    public new bool Enabled
    {
      get
      {
        return iEnabled;
      }
      set
      {
        //値が異なる場合のみ設定
        if (iEnabled != value) {
          iEnabled = value;
          UpdateTimer();
        }
      }
    }

    public uint Interval
    {
      get
      {
        return iInterval;
      }
      set
      {
        //値が異なる場合のみ設定
        if (iInterval != value) {
          iInterval = value;
          UpdateTimer();
        }
      }
    }

    public WindowsTimer()
    {
      InitializeComponent();
      initControl();

    }

    public WindowsTimer(IContainer container)
    {
      container.Add(this);

      InitializeComponent();
      initControl();
    }

    private void initControl()
    {
      MaximumSize = new Size(32,32);
      MinimumSize = new Size(32, 32);

      //Application.
      Visible = false;
      iEnabled = true;
      iInterval = 1000;
    }

    protected override void WndProc(ref Message message)
    {
      base.WndProc(ref message);
      if (message.Msg == WM_TIMER) {
        if (onTimer != null) {
          onTimer(this);
        }
        //this.BackColor = System.Drawing.Color.Black;
      }
    }

    protected void UpdateTimer()
    {
      if (TimerSet == true){
        IntPtr nIDEvent = (IntPtr)1;
        KillTimer(WindowHandle, nIDEvent);
      }
      if (iInterval != 0 && iEnabled == true && onTimer != null){
        IntPtr hwnd = this.Handle;
        IntPtr nIDEvent = (IntPtr)1;
        if (SetTimer(hwnd, nIDEvent, iInterval, IntPtr.Zero) == IntPtr.Zero) {
          throw new OutOfResourceException();
        }

        TimerSet = true;
        WindowHandle = hwnd;
      }
    }

    protected override void OnPaint(PaintEventArgs value)
    {
      base.OnPaint(value);

      if (DesignMode == true) {
        SolidBrush sb = new SolidBrush(Color.Black);
        Pen p = new Pen(sb);
        value.Graphics.DrawRectangle(p, new Rectangle(0, 0, Width - 1, Height - 1));
      }
    }
  }
}
このコンポーネントは親のウィンドウハンドルを使う必要があるため、Componentクラスの派生ではなくControlクラスから派生しています。
コンポーネントの独自のイベントの追加(OnTimerイベントに関する詳細)はこちらを参照してください。
47行目~81行目まではプロパティの内部変数の宣言や、set,get処理となります。
コンポーネント作成の際にはMiximumSize, MinimumSizeを設定します。両方に同じ値を設定することでコントロールのサイズを32x32から変更できないようにしいています。
SetTimerで設定されたタイマーは一定時間ごとにWM_TIMERメッセージを送信します。WndProc()メソッドでWM_TIMERメッセージを検出し、タイマー処理であるOnTimerイベントハンドラを呼び出します。
SetTimer APIを呼び出しタイマーをセットします。すでにタイマーがセットされてタイマーが動作している場合はKillTimer() APIを呼び出してタイマーを削除します。SetTimerではコールバック関数を設定できますが、今回はコールバック関数は設定せずWM_TIMERを用います。
デザイン時にコンポーネントの場所がわかるように、デザイン時のみ、外形の枠線を描画します。コンポーネントをわかりやすくするために表面に画像を描画するのもよいです。
OutOfResourceException の定義クラスです。
using System;
using System.Collections.Generic;
using System.Linq;
using System.Text;

namespace TimerDemo
{
  class OutOfResourceException :System.Exception
  {
    public OutOfResourceException()
    {
    }

    public OutOfResourceException(string message) : base(message)
    {
    }

    public OutOfResourceException(string message, Exception inner) : base(message)
    {
    }
  }
}
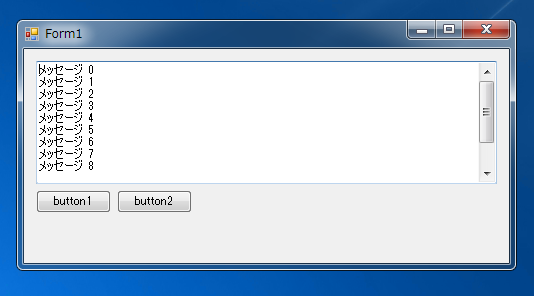
一定時間(1秒)ごとにテキストボックスにメッセージが表示(メッセージが追加)されます。
Button2を押すとタイマーが停止しメッセージの追加が止まります。Button1を押すとタイマーが再開しメッセージの追加が始まります。