ASP.NET Core Razor Pages でDIコンテナを利用するコードを紹介します。
ASP.NET Coreでは「依存関係の注入」 DI (Dependency Injection) を利用する仕組みがあります。この仕組みを使ったシンプルな実装を紹介して動作を確認します。
ASP.NET Core Webアプリケーションを作成します。
Webアプリケーションから参照するサービスを実装します。今回は MyService というサービスを実装します。
MyService.cs ファイルを作成し、下記のコードを記述します。
MyService クラスはexec というメソッド1つのみ実装されています。execメソッドは「"Hello! DI Container World!"」の文字列を戻り値として返すシンプルなメソッドです。また、MyServiceのインターフェイスを IMyService として実装します。
using System;
using System.Collections.Generic;
using System.Linq;
using System.Threading.Tasks;

namespace DIContainer
{
  public interface IMyService
  {
    public string Exec();
  }

  public class MyService : IMyService
  {
    public string Exec()
    {
      return "Hello! DI Container World!";
    }
  }
}
Startup.cs のコードを修正します。
先ほど作成したMyServiceをDIコンテナに追加します。DIコンテナに追加するメソッドは下記のAddTransiend()になります。AddTransiend()を設定した場合、インスタンスオブジェクトはサービスを取得するごとに新しいインスタンスオブジェクトが取得できます。同じインスタンスオブジェクトを受け取る場合は、AddTransient() メソッドではなく、AddSingleton() メソッドを利用します。
services.AddTransient<IMyService, MyService>();
using System;
using System.Collections.Generic;
using System.Linq;
using System.Threading.Tasks;
using Microsoft.AspNetCore.Builder;
using Microsoft.AspNetCore.Hosting;
using Microsoft.AspNetCore.Http;
using Microsoft.Extensions.DependencyInjection;
using Microsoft.Extensions.Hosting;

namespace DIContainer
{
  public class Startup
  {
    // This method gets called by the runtime. Use this method to add services to the container.
    // For more information on how to configure your application, visit https://go.microsoft.com/fwlink/?LinkID=398940
    public void ConfigureServices(IServiceCollection services)
    {
      services.AddTransient<IMyService, MyService>();
      //services.AddSingleton<IMyService, MyService>();
      services.AddRazorPages();
    }

    // This method gets called by the runtime. Use this method to configure the HTTP request pipeline.
    public void Configure(IApplicationBuilder app, IWebHostEnvironment env)
    {
      if (env.IsDevelopment()) {
        app.UseDeveloperExceptionPage();
      }

      app.UseRouting();

      app.UseEndpoints(endpoints =>
      {
        endpoints.MapRazorPages();
      });
    }
  }
}
ソリューションエクスプローラーに Pages フォルダを作成しRazorページを作成します。
Index.cshtmlファイルでは、モデルクラスとなるIndexModelを参照し、ResultText変数の内容を画面に表示します。
@page
@model DIContainer.Pages.IndexModel
@{
}
<!DOCTYPE html>

<html>
<head>
    <meta name="viewport" content="width=device-width" />
    <title>test</title>
</head>
<body>
    <p>結果</p>
    <p>@Model.ResultText</p>
</body>
</html>
モデルクラスでは、コンストラクタにIMyService の引数を受け取るコンストラクタを実装します。引数で受け取ったIMyServiceオブジェクトを_myService変数に代入し、インスタンスオブジェクトを保持します。
ページ表示時にOnGetメソッドが呼び出されたタイミングで、_myServiceオブジェクトのexecメソッドを呼び出し、戻り値をResultText変数に代入します。ResultText変数はIndex.cshtmlから参照され画面に表示されます。
using System;
using System.Collections.Generic;
using System.Linq;
using System.Threading.Tasks;
using Microsoft.AspNetCore.Mvc;
using Microsoft.AspNetCore.Mvc.RazorPages;

namespace DIContainer.Pages
{
  public class IndexModel : PageModel
  {
    private readonly IMyService _myService = null;
    public string ResultText;

    public IndexModel(IMyService myService)
    {
      _myService = myService;
    }

    public void OnGet()
    {
      ResultText = _myService.Exec();
    }
  }
}
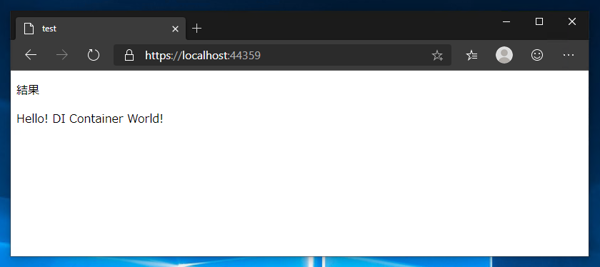
プロジェクトを実行します。Webブラウザが起動し、アプリケーションルートを表示します。下図の画面が表示されます。
画面に "Hello! DI Container World!" の文字列が表示されており、Index.cshtml.csファイルのIndexModelクラスで MyServiceクラスのインスタンスオブジェクトの取得やメソッドの呼び出しができていることが確認できます。
インジェクションするサービスが複数ある場合のコード例です。
上記のプログラムに新しいサービスクラス "YourService" を追加します。下記の"YourService.cs"ファイルを作成します。
YourServiceクラスはexec メソッド一つを持ち、戻り値で"DIコンテナの世界にようこそ。"の文字列を返します。
YourService の基底のインターフェイスとなる IYourService インターフェイスも実装します。
using System;
using System.Collections.Generic;
using System.Linq;
using System.Threading.Tasks;

namespace DIContainerMulti
{
  public interface IYourService
  {
    public string Exec();
  }

  public class YourService : IYourService
  {
    public string Exec()
    {
      return "DIコンテナの世界にようこそ。";
    }
  }
}
Startup.cs を変更します。
下記のコードを追記して、YourServiceオブジェクトをDIコンテナに追加します。
services.AddTransient<IYourService, YourService>();
using System;
using System.Collections.Generic;
using System.Linq;
using System.Threading.Tasks;
using Microsoft.AspNetCore.Builder;
using Microsoft.AspNetCore.Hosting;
using Microsoft.AspNetCore.Http;
using Microsoft.Extensions.DependencyInjection;
using Microsoft.Extensions.Hosting;

namespace DIContainerMulti
{
  public class Startup
  {
    // This method gets called by the runtime. Use this method to add services to the container.
    // For more information on how to configure your application, visit https://go.microsoft.com/fwlink/?LinkID=398940
    public void ConfigureServices(IServiceCollection services)
    {
      services.AddTransient<IMyService, MyService>();
      services.AddTransient<IYourService, YourService>();

      services.AddRazorPages();
    }

    // This method gets called by the runtime. Use this method to configure the HTTP request pipeline.
    public void Configure(IApplicationBuilder app, IWebHostEnvironment env)
    {
      if (env.IsDevelopment()) {
        app.UseDeveloperExceptionPage();
      }

      app.UseRouting();

      app.UseEndpoints(endpoints =>
      {
        endpoints.MapRazorPages();
      });
    }
  }
}
新しいRazorページ(Index2.cshtml)を追加します。
@page "/Index2"
@model DIContainerMulti.Pages.index2Model
@{
    Layout = null;
}

<!DOCTYPE html>

<html>
<head>
  <meta name="viewport" content="width=device-width" />
  <title>Test2</title>

  <p>結果</p>
  <p>@Model.ResultText</p>
</head>
<body>
</body>
</html>
Index2.cshtml.cs の Index2Model を記述します。DIコンテナに2つサービスを登録したため、コンストラクタの引数を2つにできます。
using System;
using System.Collections.Generic;
using System.Linq;
using System.Threading.Tasks;
using Microsoft.AspNetCore.Mvc;
using Microsoft.AspNetCore.Mvc.RazorPages;

namespace DIContainerMulti.Pages
{
  public class index2Model : PageModel
  {
    private readonly IMyService _myService = null;
    private readonly IYourService _yourService = null;
    public string ResultText;

    public index2Model(IYourService yourService, IMyService myService)
    {
      _myService = myService;
      _yourService = yourService;
    }

    public void OnGet()
    {
      ResultText = _myService.Exec() + "/" + _yourService.Exec();

    }
  }
}
コンストラクタの引数の順番はどのような順番しても大丈夫です。
下記のどちらの記述でも、正しく動作します。
  public IndexModel(IMyService myService, IYourService yourService)
  {
  }
  public IndexModel(IYourService yourService,IMyService myService)
  {
  }
サービス参照が無い場合は1つのみでも動作します。
  public IndexModel(IYourService yourService)
  {
  }
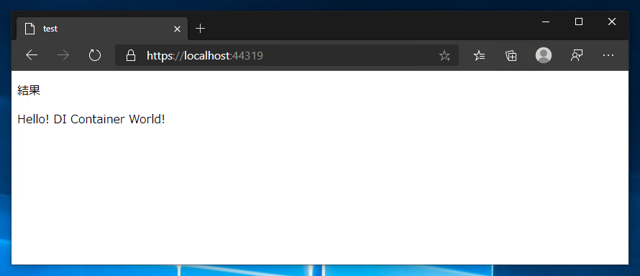
プロジェクトを実行します。デフォルトではIndex.cshtmlのページが表示されます。サービスを追加しましたが、従来のコードそのままで動作します。
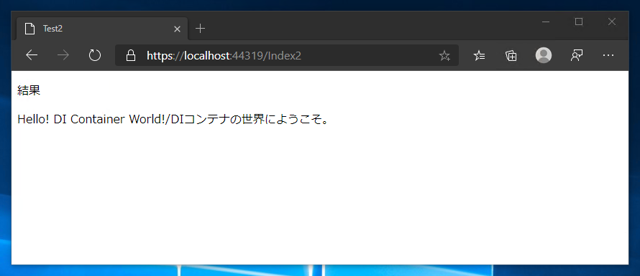
(アプリケーションルートのURL)/Index2 のURLにアクセスします。下図のページが表示されます。MyService, YourService のそれぞれのExecメソッドが実行できていることが確認できます。
上記のプログラム例からDIのメリットは下記があります。
ASP.NET Coreではフレームワークが提供するサービスオブジェクトがあります。必要となるサービスオブジェクトをコンストラクタインジェクションで簡単に追加できます。
DIコンテナに登録すれば、コンストラクタに参照したいオブジェクトを追加するだけで簡単にオブジェクトの参照を追加できます。
DIを利用したコードでは、インスタンス化されたオブジェクトがコンストラクタの引数で渡されます。そのため、参照元のクラスでインスタンスを作成する必要が無いため、参照先のクラスの参照も不要になります。
クラスのインスタンスをクラス型の変数に格納すると、クラスへの参照が必要になりますが、DIでは参照先のクラスの基底のインターフェイス型の変数を利用してインスタンスオブジェクトを格納します。このため、メソッドの呼び出しなどにおいてもクラスの参照が不要になります。
[Inject] 属性はBlazor アプリケーションでのみ利用できるようです。詳しくはこちらの記事を参照して下さい。